
Boat trailer lights not working is a ground fault far more often than a burned-out bulb. On a submersible trailer the current returns through the frame, and the frame is the part that corrodes. Check the ground first, then the connectors, then the lamps, then the harness — in that order, most faults turn up in the first ten minutes.
What Lighting a Boat Trailer Is Legally Required to Carry
In the United States, a trailer wider than 80 inches (2,032 mm) must carry rear clearance lamps, and those lamps may not be combined with the tail lamps — they must be separate fixtures. That catches out owners of wide trailers, who assume the tail light assemblies cover it.
| Light or device | What it does | Where it fails |
|---|---|---|
| Tail lamps (red) | Marks the trailer’s rear width | Grounding mounting stud; lens gasket |
| Brake lamps (red) | Shows the tow vehicle is braking | Bulb socket corrosion |
| Turn signals | Direction indication, rear and often front | Connector pins, then socket |
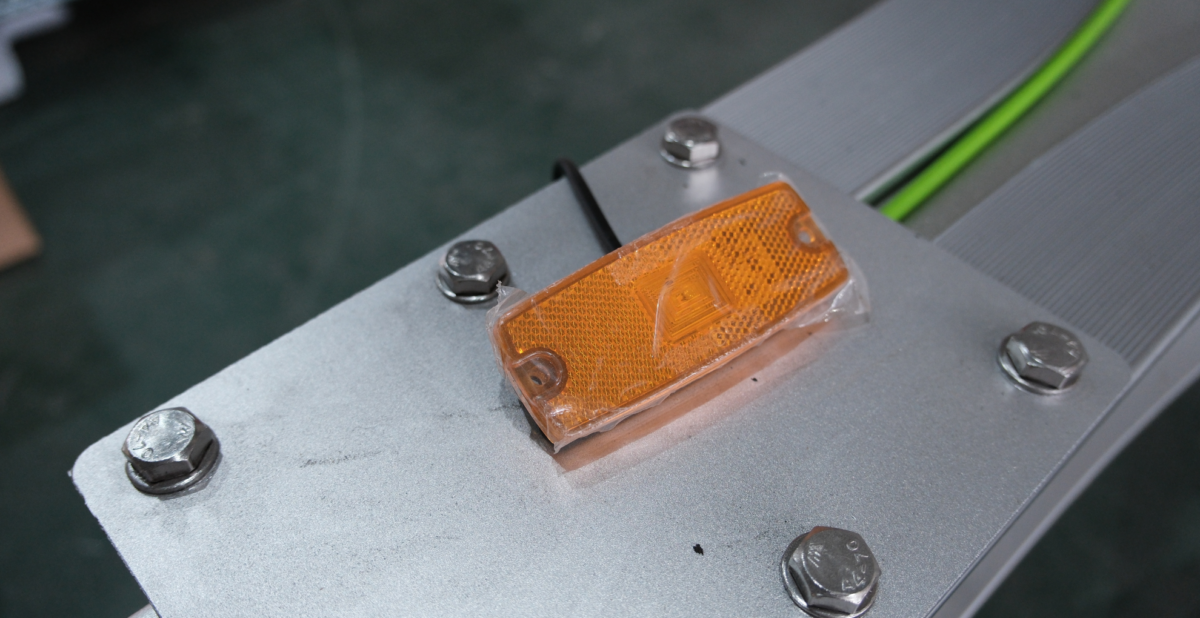
| Side marker lamps — amber front, red rear | Marks the trailer length at night | Lens gaskets; wiring behind the frame rail |
| Rear clearance lamps — required over 80 in (2,032 mm) wide, and must not be combined with tail lamps | Marks the full rear width | Grounding mounting bolts; crimped pigtails |
| Reflectors — red rear, amber sides | Marks the trailer when parked or unlit | Damage and adhesive failure |
| License plate lamp (white) | Illuminates the license plate | The bracket’s ground path |
Trailers shorter than 6 feet (1.83 m) are exempt from front side marker lamps. The thresholds come from 49 CFR Part 393, with a qualifier that matters: Part 393 governs commercial motor vehicles. A privately owned, non-commercial boat trailer is regulated mainly by state law, and most states adopt thresholds close to the federal ones. If you are unsure which rule applies on your route, check with your state motor vehicle authority.
Why Boat Trailer Wiring Fails Faster Than Any Other Trailer’s
Boat trailer wiring fails faster than any other trailer’s because three damage mechanisms act on the same harness at once, and they do not act independently: full immersion at every launch, road vibration, and electrochemical corrosion at every connection.
- Vibration opens the seals. Road vibration and the shock of a launch ramp work on every crimp, grommet, gasket and lamp housing. A lamp that was watertight on the bench develops a hairline path at the lens gasket or where the pigtail enters the housing.
- Water gets in through that path. Once the seal is compromised, immersion fills the housing, and the lamp holds water against its contacts for the rest of the season.
- Corrosion accelerates at the joints. Fresh water is a mild electrolyte; salt or brackish water is an aggressive one. Where copper wire meets a brass terminal, or a steel stud meets an aluminum or galvanized bracket, you have the three conditions for galvanic corrosion: two metals at different potentials, an electrolyte, and a conductive path. Resistance rises, and the lamp goes dim or dead.
The cycle compounds. Corrosion roughens the contact, which worsens the seal; a failing ground forces current through a higher-resistance path, producing heat, which drives water out and pulls more in on the next cold dip. The same process runs on a trailer launched twice a year in fresh water and one launched every weekend in salt water — at completely different speeds.
It is also why these faults are called intermittent. A corroded joint is not an open circuit; it is a resistor that changes with temperature, moisture and vibration. The lights work in the driveway and fail at the ramp.
The Troubleshooting Order That Actually Saves Time
Work ground first, then connectors, then lamps, then harness. Ground and connector faults cause the large majority of “boat trailer lights not working” cases, and because they sit at the start of the circuit, a fault there mimics a fault anywhere downstream.
Step 1 — Prove the ground
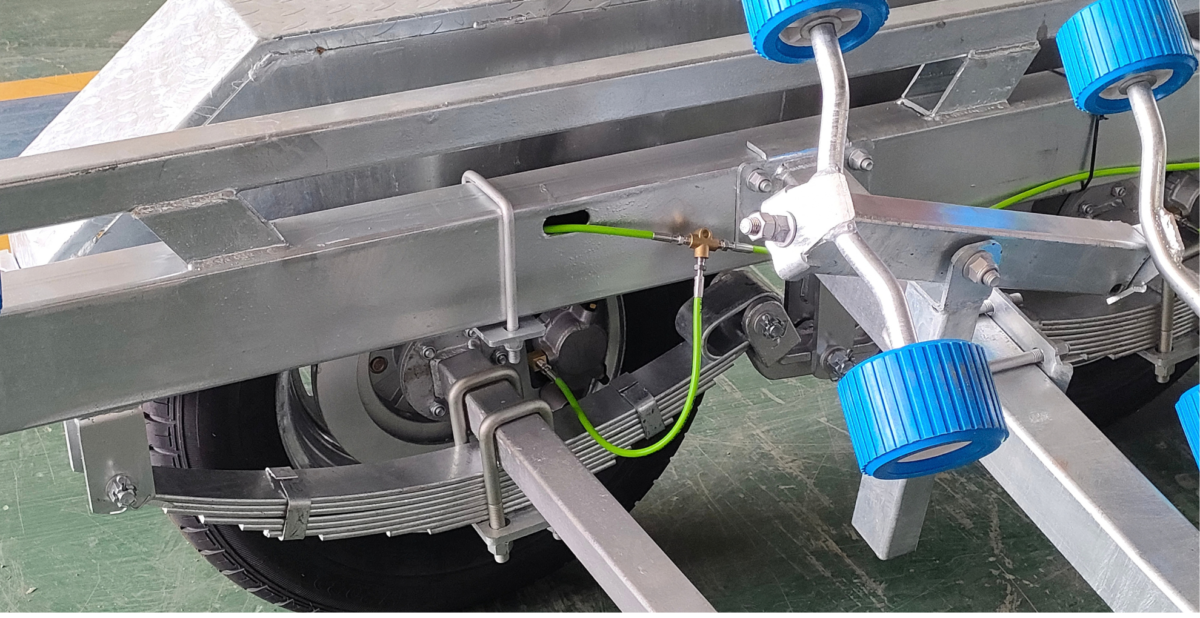
Most trailer harnesses have no dedicated ground wire running the length of the trailer. The return path runs from each lamp housing into the frame and back to the connector, so it has to survive every bolted joint along the way — and each of those is a corrosion site in salt water.
- The jumper test. Run a jumper cable from clean metal on the towing vehicle’s frame to clean metal on the trailer frame, or straight to a lamp housing body. If the symptoms change — lamps brighten, a dead lamp returns, a flicker stops — the ground is your fault.
- The meter test. Set a multimeter to resistance and measure from the lamp housing body to a known good ground on the towing vehicle. Any meaningful resistance means the path is suspect. Compare a working lamp against a faulty one.
Step 2 — Inspect the connectors and pins
Unplug the trailer connector and look at the pins. Brass that has gone dull, green or white is oxidised, and oxidised brass is a resistor. Clean the pins, then apply dielectric grease. On a 4-way flat connector, check the ground pin specifically: it carries the full return current for every lamp on the trailer and is the one most often overlooked.
Step 3 — Test the lamps and lamp assemblies
Only now touch the lamps. Swap in one you know works, and look at the bulb socket for rust, water staining or a collapsed contact spring. A filament that is intact but blackened is on its way out, and a lamp with water inside the lens will fail again whatever you do to the loom.
Step 4 — Chase the harness
A break inside the insulation is the least likely fault and the slowest to find. It usually sits where the harness flexes: behind the coupler, where the loom drops to the axle, and where it enters each lamp bracket. Test continuity from the connector pin to the lamp end while flexing the loom by hand — a reading that comes and goes locates the break.
Running the steps in reverse is the standard mistake. Replacing lamp assemblies that were never broken, then cleaning connectors, then finally running a new ground wire costs an afternoon to reach an answer that step one produces in two minutes.
| Symptom | Most likely cause | First check |
|---|---|---|
| All lights dead | Ground, or connector not seated | Jumper test frame to frame |
| One lamp dead, others fine | That lamp’s local ground or socket | Temporary ground to that housing |
| Lights dim, or brighten when you brake | High-resistance shared ground | Connector ground pin, then frame joints |
| Turn signal works on the car, not the trailer | Connector pin, or a load-sensing flasher | Pin continuity, then the LED load issue |
| Works in the driveway, fails at the ramp | Corroded joint opening under vibration | Flex the harness while watching the lamps |
LED vs Incandescent: What Actually Changes on a Boat Trailer
LED lamps suit a submersible trailer better than incandescent lamps for reasons beyond brightness — but the swap introduces one problem many owners do not see coming.
| Factor | Incandescent | LED |
|---|---|---|
| Vibration resistance | A filament on its own supports; shock breaks it | No filament or moving parts; shock barely affects the light source |
| Service life | Short, and it degrades — the filament blackens before it fails | Very long by comparison; often outlives the trailer’s other wear items |
| Sealing | Housing seals around a hot bulb and socket, so heat cycles the gasket | Runs cool, so the seal is not thermally cycled from inside |
| Current draw | Several times an LED equivalent, on every lamp | Low — both the advantage and the problem below |
| Cost | Lower purchase price, higher replacement frequency | Higher purchase price, spread over a longer life |
| Behavior on corroded wiring | High current through a corroded joint means voltage drop, dim lamps and heat | Tolerates a resistance that would visibly dim an incandescent lamp |
Low current is why LEDs last longer and behave better on a tired harness: less current through a corroded joint means less voltage drop and less heating. It is also why some tow vehicles will tell you a brand-new LED lamp is burned out.
Flashers and lamp-out detection systems on many vehicles measure current, not light output. An LED turn signal draws far less than the incandescent lamp it replaced, so a thermal flasher may not heat enough to cycle, producing hyperflash or no flash, and a bulb-failure monitor may throw a dash warning or refuse to operate the circuit.
The usual fix is a load resistor across the turn signal circuit, drawing roughly what the original lamp drew. Mount it to metal: it dissipates heat and will damage a plastic lens housing if you tuck it against one. Check the owner’s manual first, since some towing packages have a dealer-configurable LED trailer setting.
Routing and Waterproofing the Harness
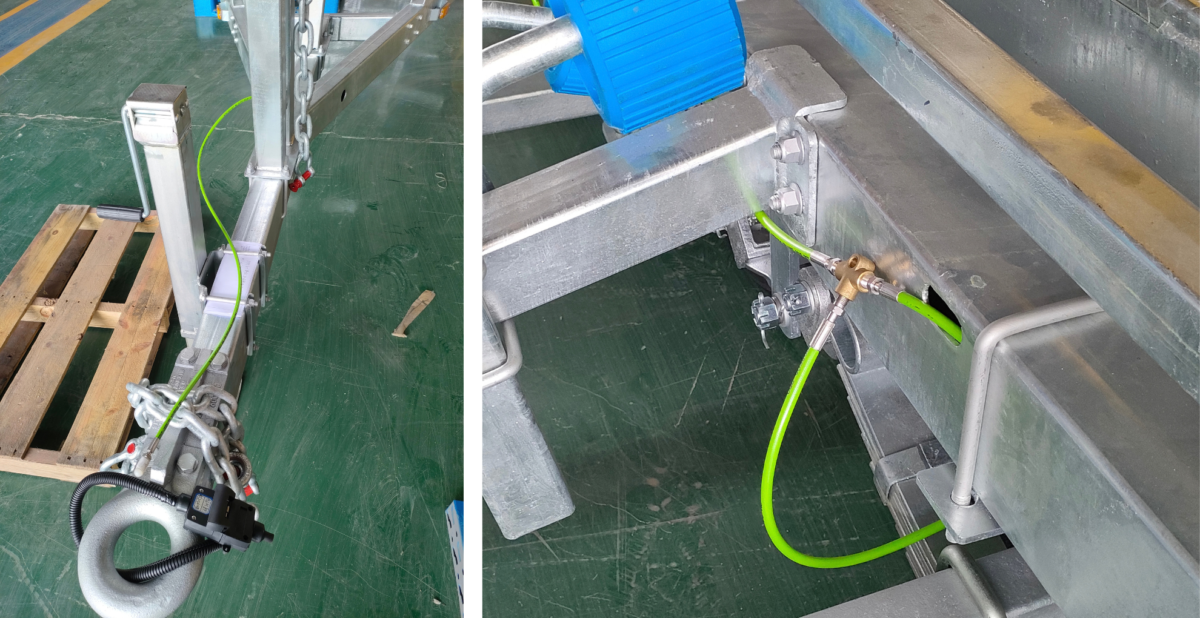
Most harness failures are decided at build time, or when someone splices in a new lamp. The routing rules are simple:
- Never create a low point that holds water. A harness that dips below the level of its own endpoints becomes a trap, and water sitting against a splice will find the splice. Run the loom so it drains toward the rear or the connector. The exception is the connector, which should hang below the coupler so it drains rather than fills.
- Point every connection downward, so water runs off a joint instead of into it.
- Use adhesive-lined heat-shrink over every splice. A crimp connector, even a good one, is not waterproof.
- Grease waterproof connectors. Dielectric grease inside the connector body displaces water and slows pin oxidation.
- Do not drill into the frame to mount wiring. Every hole breaks the galvanizing and exposes bare steel, which is a corrosion initiation site for the whole frame — you have traded an electrical problem for a structural one. Use existing holes and clamp-on clips. Where a conductor must cross a frame member, seal the hole and fit a grommet.
One trade-off: running the loom inside a box-section frame rail protects it from debris and sun, but lets water sit against the insulation. If you do it, seal both ends.
Wiring is only half of keeping a submersible trailer alive — the running gear takes more punishment. The boat trailer maintenance guide covers the full schedule, and the saltwater bearing service intervals cover the item that fails most often on a wet-launched trailer.
The 60-Second Pre-Launch Light Check
A two-person check in the car park takes under a minute and catches nearly every fault that would otherwise surface on the road. The helper stands ten feet behind the trailer; the driver stays in the seat.
- Running lights on. Confirm both tail lamps, both red rear side markers, both amber front side markers and the license plate lamp. Amber front, red rear.
- Brakes applied. Both brake lamps light at full brightness. One working and one not is a ground or socket fault, not a bulb problem.
- Left turn signal. Rear left flashes. Watch the running lights for a change in brightness at the same time — that is a shared ground fault.
- Right turn signal. Same on the right side.
- Hazards on. All four corners flash together, confirming both turn circuits are live.
- Brakes held with hazards on. If the running lights dim noticeably when the brake lamps come on, the ground is carrying more current than it can handle. That trailer will fail somewhere on the drive.
- Physical walk-back. Push each lamp housing and the loom where it enters the frame. Any lamp that flickers when moved has a marginal ground or a broken conductor.
Repeat the check after your first stop. Heat and vibration turn a marginal joint into an open circuit, so a system that passed in the driveway is not proven until it has run at highway speed.
Frequently Asked Questions
Why do my boat trailer lights not work but the bulbs look fine?
Because the bulb is usually fine and the return path is not. Most trailer harnesses ground through the frame rather than a dedicated wire, so the circuit depends on bolted joints that corrode in salt water. Run a jumper from the tow vehicle’s frame to the trailer frame — if the symptoms change, you have found it.
Do I need a load resistor for LED trailer lights?
Only if your tow vehicle complains. Some flashers and lamp-out monitors measure current rather than light output, and an LED draws far less than the incandescent it replaced, so the vehicle thinks the bulb has failed. Fit a load resistor across that circuit and check the owner’s manual first.
Can I ground trailer lights to the frame?
You can, and most trailers do, but the frame is the weakest conductor once it starts corroding. Better is a dedicated ground wire from each lamp housing back to the connector. If you keep the frame ground, clean and retorque those points every season.
Why do my trailer lights flicker or dim when I hit the brakes?
That is the signature of a high-resistance ground. Brake lamps add current to the same return path, so the extra current through a corroded joint produces more voltage drop and the running lights dim. Fix the ground and it goes away.
How do I test a boat trailer ground wire?
The quick way is a jumper cable from clean metal on the tow vehicle’s frame to clean metal on the trailer frame. The definitive way is a multimeter on resistance, from the lamp housing body to a known good ground on the towing vehicle.
Are submersible trailer lights worth it?
Yes, if you launch regularly. A sealed, submersible-rated lamp assembly is built to be immersed and to drain, which a standard housing is not. But a sealed lamp will not fix a bad ground — and a bad ground makes a good lamp look like a bad one.
If you are buying a trailer for regular saltwater launching, the lighting layout is worth specifying up front rather than repairing later. Have a look at our hot-dip galvanized twin-axle marine trailer, or contact us for a quote with your boat’s beam, weight and launch frequency. Lighting rules vary by state, so tell us where the trailer will be registered — the country-by-country trailer regulations summary is a useful starting point.